First need to add cloth, then need to maintain your rate and measurements. This Activity you have to do first time only
- Click on Rate Card Option
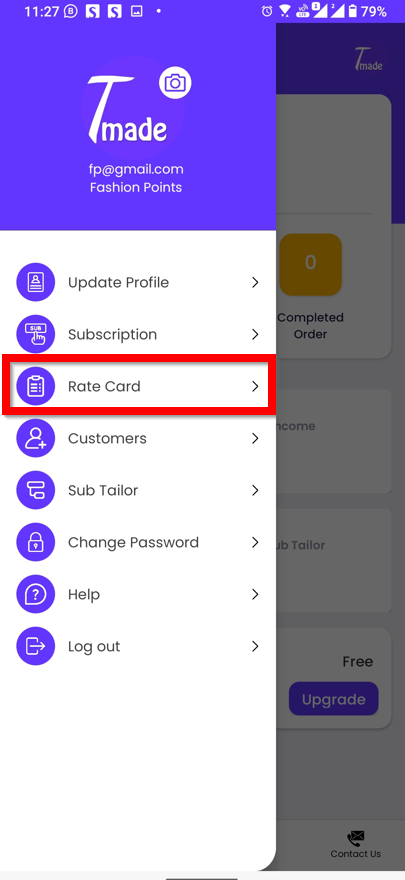
- Click on Add new Cloth

- Add the Cloth Details as shown in below Screen
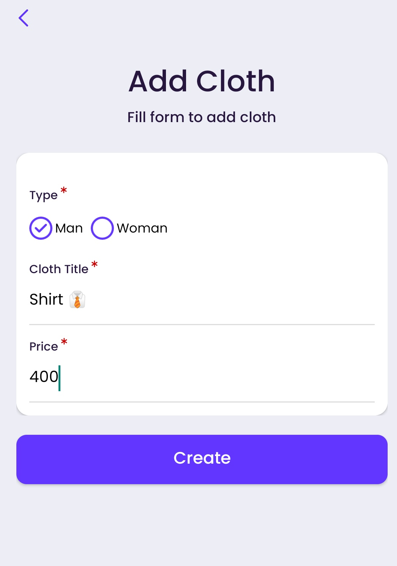
- Set the Gender
- Cloth Name as Title
- Maintain your Rate Card
- Click on Create, Your Cloth now added

- You can give extra option such as extra pocket, extra button

- Click on “+” button to add extra option


- Click on “Middle Button” to maintain Measurement details

- Here we have added “Length”, also you can set type such as “cm” or “inch”, do you want extra note then you can select, and order number to display

- You can add more option such as Full sleeves, half sleeves using “dropdown” option

- Now you are ready to create your first order
- Click on the “Stitch” Button at bottom Screen

- Enter Customer Mobile Number and Name, it will automatically added once order placed
- Select the Gender, According to the Gender Selection your cloth list will appear

- Select the Gender, According to the Gender Selection your cloth list will appear

- You can fill the details such as measurements, discount, advance amount as shown in the screenshot

- Click on the Confirm button to create the Order

- Once your Order confirm, order will look like below screen

- Here you can get the all the details as mentioned while an order creation
- You can edit advance amount, delivery date, measurements


- You can share your Invoice copy to the customer, in this copy only cloth rates display

Your Order succesfully Created